Refinishing your drumset! (getting an awesome natural finish DIY)

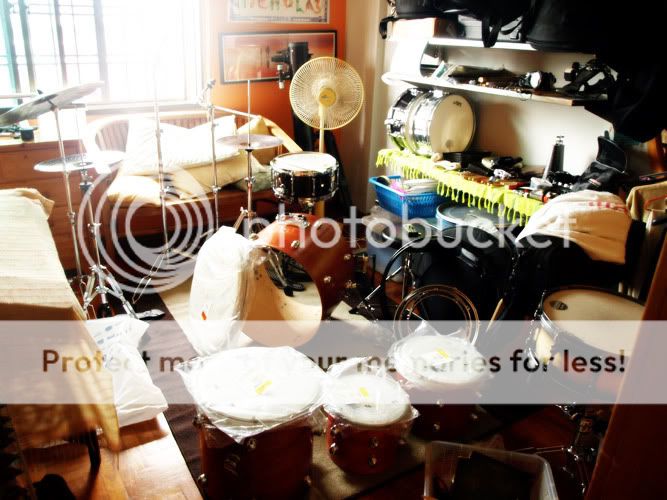
Okay I figure that some people might be interested to see how I did this... so I'm posting this into a thread here. Posting into a few posts because of number of image restrictions.

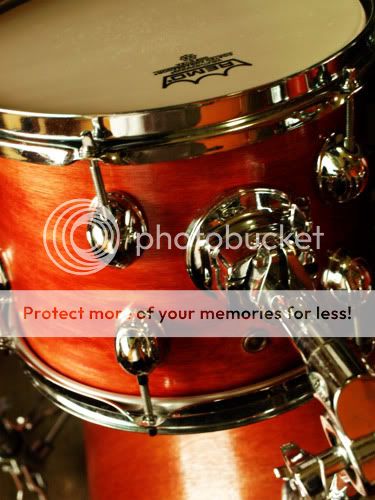
I got inspiration to do this from pearldrummersforum.com; I saw a lot of people there (mostly westerners I think) doing a lot of DIY with their own drums. So some time back, because my school became less busy for a while, I set aside some time to refinish my Pearl Target drumset. It looks a lot better after I replaced the "piano black" wrap with lacquered red wood.

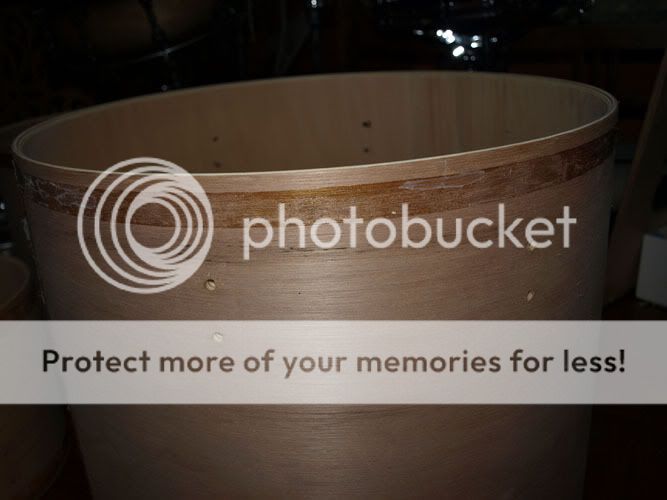
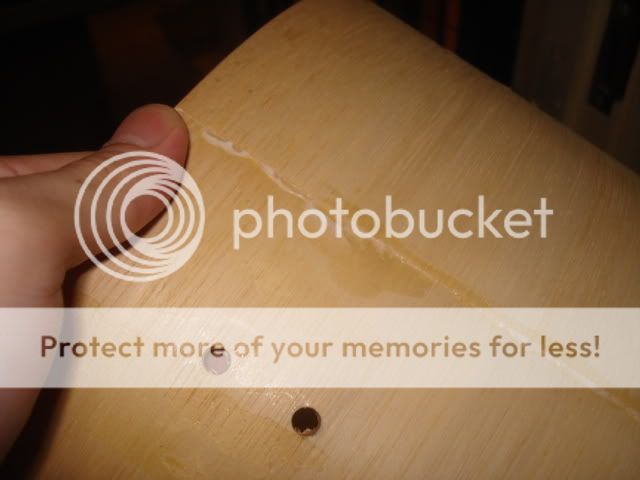
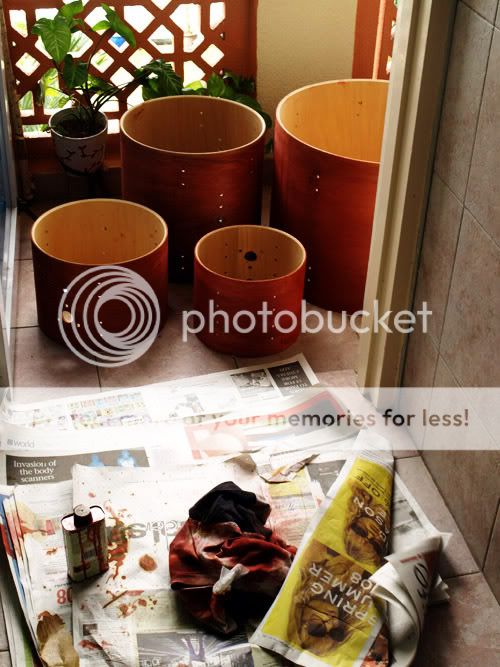
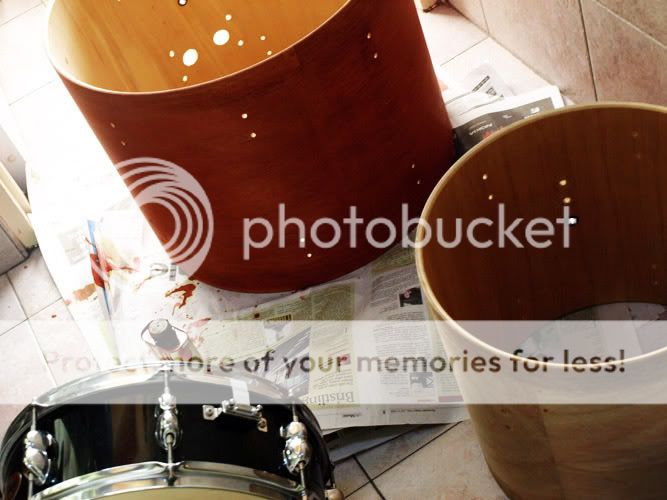
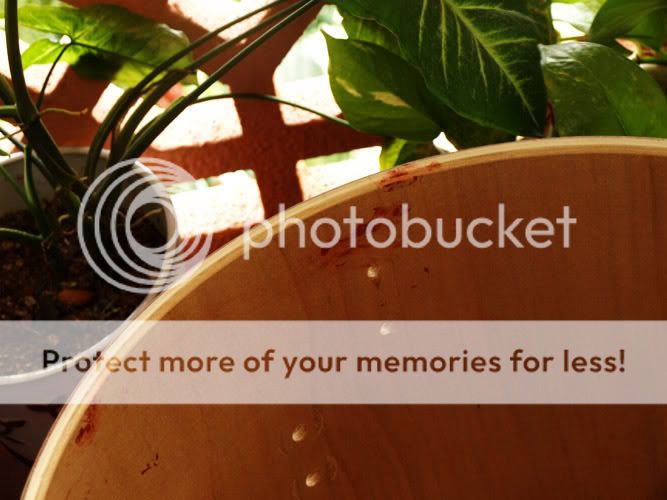
Throughout, BE VERY CAREFUL not to damage your drums. The wood is strong but it only takes a little bit of chipping to damage it. Most especially, the "bearing edges". This is the part of the shell that actually touches the drumskin (the top and bottom rims of the shell) so it's very important. Always be careful with them. You might want to put the drums on a soft surface; I did everything on thick layers of old newspaper so it protected both the floor and the drum.

You'll need to prepare:

1) Sandpaper, in various grades of roughness
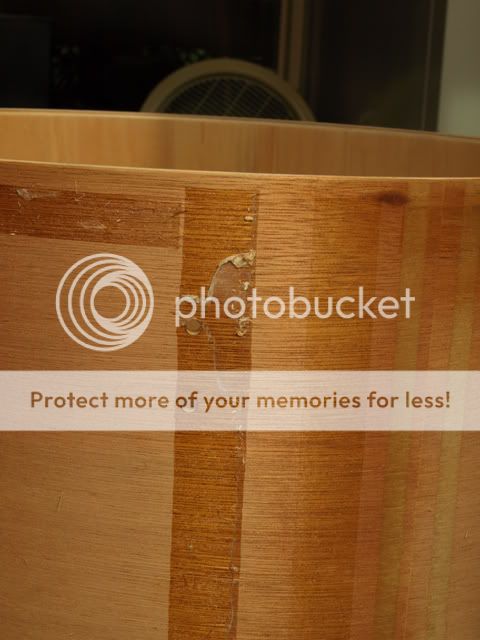
2) Thinner or something else to remove glue
3) Rust remover, metal polish (if required)
4) Wood dye (or wood stain or paint, but I think dye is better)
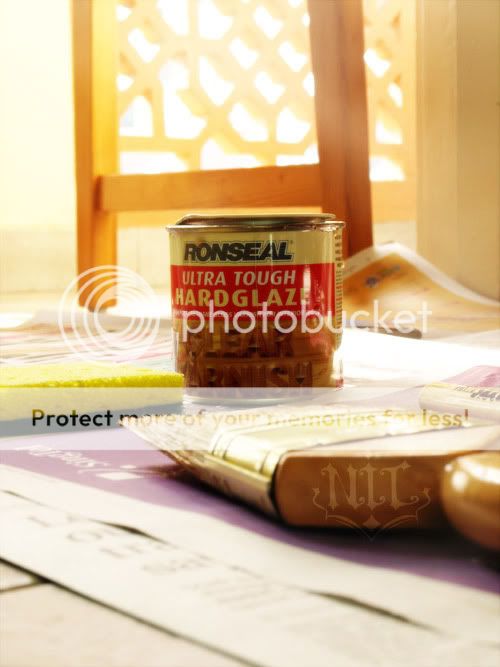
5) Lacquer/clearcoat/polishing oil
6) Cloth (rags) and paintbrush (preferably very large, makes your job easier)
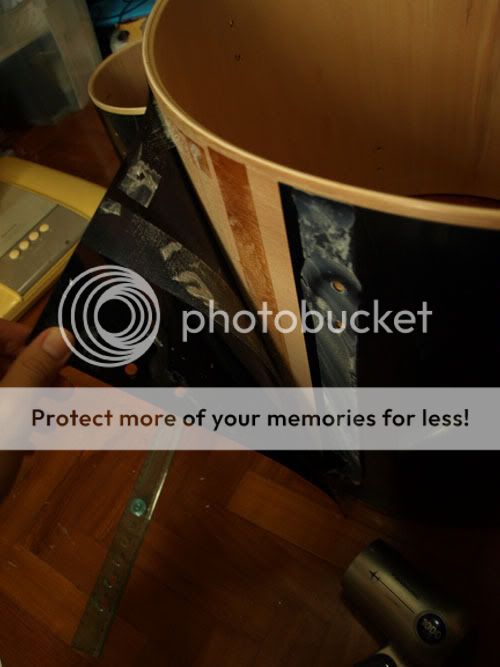
7) Hair dryer or something else that can shoot hit air
8) Something sharp and thin, e.g. ruler or something
9) Screwdrivers, drum keys, etc. to take apart the drums
10) Something to cover the floor (it will be messy)
11) Something to cover yourself (especially your hands, trust me on this)

Dismantling drumset

First thing to do, of course, is take apart your drumset.

P7071712.jpg


Remove all the hardware. It's surprising that the hardware is possibly HEAVIER than the drums. Picking up the drumshell is surprisingly light.

P7071718.jpg


You may have to polish off any rust or stains that the hardware has. Trust me, don't ever let your drumset get horribly dirty, it's a pain in the ass to clean up.
 
Last edited by a moderator:
P7071716.jpg


After that, you can start peeling off the wrap. It's glued on. The glue can be loosened with heat, e.g. hair dryer. Don't set it to too hot, go up and down the edge and pick at it with your fingers or some thin thing like a ruler or penknife, just be very careful not to scratch the wood. You can see that when they wrap around, it overlaps on the little bit that they glue there, so for this you can use something sharp.

P7071721.jpg


Now just work with your fingers and hairdryer. You'll probably find it easier to wedge the drum between your legs and hold it tightly with your tighs while your hands work at it. Go slowly, let it heat up and pull it off gently. You don't want to accidentally rip off part of the wood while peeling the wrap.

Different drumsets will probably be glued differently. My Pearl Target had seals at the edges and down the length of the shell, while the Pearl Forum that I worked with was glued only at the overlapping area. I've also heard of drums that are glued throughout, those must be horrible to work with.

P7071723.jpg


I couldn't figure any way to remove the vent and put it back nicely, so I left it in. Consequently, I had to cut away the wrap around the vent.

After a while, though, I found a better technique. I made a cut in the wrap in the direction of the vent, then pulled. I don't know how to describe this. But if you pull it correctly, you'll be able to pull all of it out from under the vent without leaving any traces.

P7071724.jpg


The glue will leave stains on the drum, you'll have to remove it.
 
Since the glue leaves stains, prepare thinner and sandpaper.

P7071733.jpg

Focus on the wood grain as it is now- this is what it looks like under the wrap. It isn't as nice as those pretty veneers that come on high-end drums, but it sure beats plain black. Taken with flash for greater clarity in the absence of steady hands or a tripod.

You can attack the glue traces with various things. I've seen "glue removers" at hardware shops, but what I used was thinner.

P7091737.jpg


In this photo, on the left is the untouched part, while on the right is after thinner. There'll still be some traces, I think it's because the glue gets a little absorbed into the wood or something. You'll have to sandpaper it off.

Go to a hardware shop and ask for wood sandpaper. You can get it in various grades, I can't remember exactly what I used, but it was fairly coarse. If you feel worried about it, use fine sandpaper first. If you can't get it off with fine sandpaper, then use coarse sandpaper. After that, you might want to use the fine sandpaper again to smoothen out the surface.

This was for my Target drumset. The shell glueing is slightly different from the Forum drumset; this one the plies fit in "circles" while for the Forum the plies spiral outwards. So on that one, you'll have a very problematic seam at the outside:

DSC00117.jpg


I had to very carefully sand off that one. It's a serious pain in the ass. Because it's a spiral, so there'll be a matching seam on the inside of the shell. So if you peer inside your shell and see a seam like this too, you might want to think twice and decide if you REALLY want to go through the trouble.
 
Dyeing drumset
For this I used "COLRON Wood Dye" that I bought from Homefix DIY. Very easy to find. If you can't find, ask them for "Wood Dye". Pick the colour yourself.

bottle.png


and a cloth.

rag.png


Wood dye penetrates into the wood. That means if you cut or dent the wood, it'll be the same colour inside. Stain only hits the top surface. Also, if you think the wood might be stubborn and refuse to accept the colour, then dye can penetrate it more strongly than stain can.

Paint will cover over the top surface. This will give you a nice solid colour. But with dye, you can get to see the wood grain.

Also, it'll only stain or dye the parts that you apply it onto. I'll go more into that later.

For every process so far, I started work on the bass drum first, simple because it was the biggest by far, and after finishing the bass drum, all the other drums would seem so simple in comparison. Also, I started work on the bottom of the bass drum, so that if I screwed it up, it'll be resting against the floor anyway, so it wouldn't be seen.

Anyway, the process was rather quick. I used rubber gloves, and kept my right hand free to manipulate the shell around. I handled the dye and cloth with my left hand. It's quite simple, slopping dye onto the cloth and wiping it evenly across the shell.

Here's the result.

P7161907.jpg


P7161908.jpg
 
As a comparison, I took this photo halfway through.

P7161904.jpg


There's the dyed bass drum, undyed floor tom, and the matching snare for the drumset, just that it no longer matches the toms and bass. I think, this deep red natural finish is much nicer than the original black wrap.

I had a bit of problem, though. Without realizing, I accidentally got some dye onto my right hand, and ended up leaving some stains on the inside of the shell.

P7161909.jpg


No one will see, though, so don't worry about that =P if you're really worried, wrap newspaper on the inside first just in case or something. Or you can lacquer the inside. This apparently changes the sound a little (some people do that on purpose, never tried it before) but also, it makes the inside immune to stains.
 
Lacquer


I used Ronseal Ultratough Hardglaze (Clear Varnish), also from Homefix DIY.

P7171920.jpg


On the bottle of Colron Wood Dye they recommended using Clear varnish. I like the result.

I used a wide brush from Nippon Paint, and the butt end of a broken drumstick to stir the varnish. Since drumshells are not very intricate (they're just cylinders) you don't need a fine brush, in fact, you'll very much prefer the big brush since it can brush a lot of area at once.

Set up my drum shells on a bamboo pole between two chairs.

P7171916.jpg


P7171917.jpg


The umbrella at the end is to protect from direct sunlight and just in case it suddenly starts raining.

Before working on it, I lightly "sanded" it with a rough cleaning sponge (I couldn't find extremely fine grit sandpaper around, I think it has to be specially ordered, so I made do with this). I didn't rub too hard in case it took off anything important, so I just went over until it looked and felt smooth and I couldn't see any specs on it.

I started from below and brushed upwards to prevent drip, slowly turning the shell until I covered the entire area. I could cover maybe, one quarter to one third of the drum with each dip of the brush, then smoothened it out. After going one complete round, I continued "brushing", but without dipping for more varnish, to smoothen out the existing varnish on the shell.

Started with the bass drum, again. Initially, I had too much lacquer on my brush, so it was dripping a little. I smoothened it out, and managed to get the right amount on subsequent brushing.

You can do multiple coats, but do thin coats each time. In fact, you SHOULD do multiple coats.
 
Finishing up

When it dries, you might want to polish it a little. Make sure you leave it overnight, or if you can wait a few days, even better. You can also get lacquer polish from wherever you got your lacquer, this makes the outside even more shiny.

Then, put the hardware back on.

P7191937.jpg


P7191955.jpg

P7191952.jpg


It works on drumsticks too, just make sure you get the unlacquered kind.

P9152042.jpg
 
This looks DAMN nice! That red looks so bloody and raw. Great job, I shall buy unlacqeured sticks and try this
 
If you've been on the pdf have you seen cinematicsam's amazing refinishing job on his export? It is so beautiful.

Nice job, the wood grain is actually pretty nice. I say this because I have a piano black target too, unfortunately with the bigger tom sizes, I might try to cut them down. How do you like the sound of your kit? I have actually been contemplating refinishing it for the longest time but it just seems like such a huge overhaul plus I wasn't sure if the wood grain would be any nicer to look at, how long did the whole thing take you?

Another thing was the black bass drum hoops, I never liked how it looked with natural finishes to be honest, so I decided not to refinish my kit.

Maybe you should get some wood hoops! (though it'll burn a hole in your pocket)
 
Thanks for the positive comments! I hope this inspires others to do more DIY stuff around Singapore. When I can get access to tools, I hope I can also make my own drums, seeing a lot of people doing it online makes me want to do that too.

This looks DAMN nice! That red looks so bloody and raw. Great job, I shall buy unlacqeured sticks and try this

I posted a thread some time back about dyeing sticks. You should take a look. Someone advised me to get these sticks from Ranking Sports and Music from Bras Pasah. These are Vater "NUDE" sticks, doesn't have lacquer. Sanding off conventional sticks to be dyed take way too long, and I suspect will damage the stick.

The nice thing about the dye is that since it penetrates inside, even when the stick chips, there's still red underneath.

Kick ass!

The bass drum hoops are ... Heh..

Me likey your snare collection.

Hahaha bass drum hoops I was intending to get wood hoops but, it was not easily available in Singapore and too expensive. The black looks fine, anyway.

Great work! The drums look great!

I like your guzheng in the corner ;)

Haha that's actually my principal instrument, drums is a very expensive "hobby" since I don't really take lessons or gig seriously with it.

If you've been on the pdf have you seen cinematicsam's amazing refinishing job on his export? It is so beautiful.

Nice job, the wood grain is actually pretty nice. I say this because I have a piano black target too, unfortunately with the bigger tom sizes, I might try to cut them down. How do you like the sound of your kit? I have actually been contemplating refinishing it for the longest time but it just seems like such a huge overhaul plus I wasn't sure if the wood grain would be any nicer to look at, how long did the whole thing take you?

Another thing was the black bass drum hoops, I never liked how it looked with natural finishes to be honest, so I decided not to refinish my kit.

Maybe you should get some wood hoops! (though it'll burn a hole in your pocket)

Yeah, he's one of those who inspired me to do it. Actually, you should go look around for more information. This is just how I did mine, but there's many other ways you can use. And my finish isn't as perfect as I would like it to be, because I can't find superfine sandpaper to polish it after everythin's over.

It took me just under two weeks to do it. But that's because I was busy. If you work on it everyday, you can spend one to two days dismantling and polishing, one day dyeing, one day lacquering, wait for it to dry, then put it back together. Considering your larger sizes... lemme guess, is it the 12-13-16-22 configuration? I recently got 13, 16 and 22 from a friend, and refinished them to match. Took me a week to do those three.

Of course, if you have the time, you should always spend more time/effort on it!

The sound is okay I guess. With good heads, it's not bad. But it's not amazing either. When you hear good drums you really feel good playing them. This one, when I play it, I just don't feel bad.

Hahahaha forget the wood hoops, man. Ordering it will cost almost 200!
 
Does this affect the overall sounding of your drums (without the wrap)?

I changed heads right after, since I didn't really like the sound before that. I'm satisfied with the sound now. It may be due to heads, or it may be due to the wrap removal.

Hmm but I noticed that my bearing edge already had some nicks, and true, there's some annoying ringing here and there which I put down to those.
 
Good lookin refinish job!
those lugs look much better on the woodgrain finish.
If you've got annoying ringing you could try waxing or even using good old vaseline on the bearing edges. the magical C&C method. gives better contact between the head and the edges.

Hahahaha forget the wood hoops, man. Ordering it will cost almost 200!

i think they're only $35-40US or something like that at drummaker.com or drumfoundry.com.
you could dye them to match the kit
shouldn't be tooooo much to ship either.... i'm guessing it'd be around the same or little cheaper than to get them to australia
 
Good lookin refinish job!
those lugs look much better on the woodgrain finish.
If you've got annoying ringing you could try waxing or even using good old vaseline on the bearing edges. the magical C&C method. gives better contact between the head and the edges.


i think they're only $35-40US or something like that at drummaker.com or drumfoundry.com.
you could dye them to match the kit
shouldn't be tooooo much to ship either.... i'm guessing it'd be around the same or little cheaper than to get them to australia

I don't really know how to use wood filler, so I'm staying away from it for now. Anyway, the way I see it is that with so many toms close to each other in a small room, even if I have nice edges, the resonance is going to set up a lot of overtones anyway.

Hmm okay, say one hoop is about US$40, two will be US$80 and they quoted me around another US$50 or so for shipping if I remember correctly. When converted, that's close to S$200. That's what I mean by 200, in Singapore currency...
 
Back
Top